Say goodbye to having to break your bills at a gas station by buying a soda after you've used an ATM to get the $1's and $5's you need for the tooth fairy, field trips, and whatever else life has thrown at you last minute. With our new ITMs, you can actually customize the bills you receive when withdrawing your money from your account.
Follow our easy walk-through below to learn how.
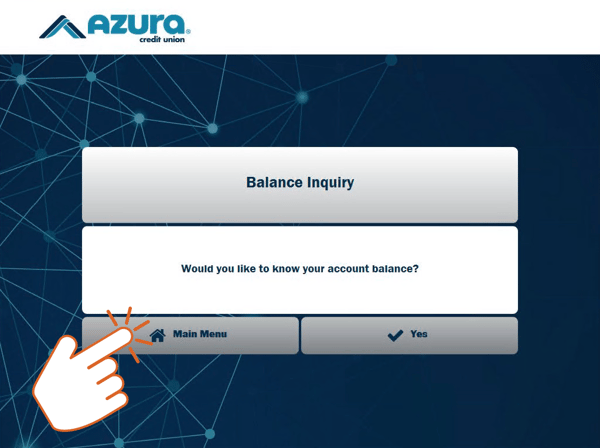
STEP 1: NAVIGATE TO THE MAIN MENU
This step may seem obvious, but if you're new to our ITM system it's the perfect step to get familiar with the menu and display set up.
When you insert your card and enter your pin number, this is the first screen you should see. If you don't need to check your account balance, select the "Main Menu" button to continue to step two.
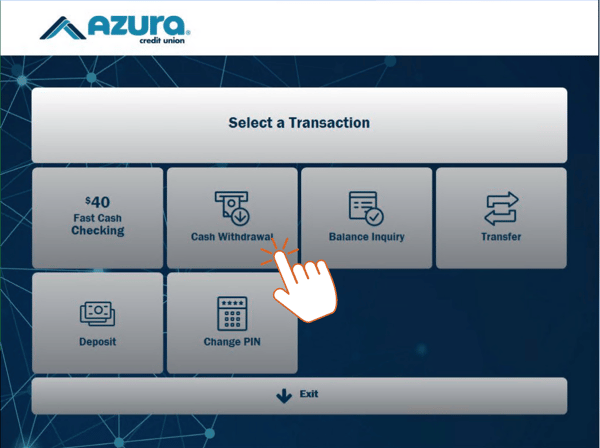
STEP 2: SELECT CASH WITHDRAWAL
To customize the bills you receive, you want to hit the button that says "Cash Withdrawal".
*NOTE: If you select Fast Cash you will NOT be able to customize the bills you receive.
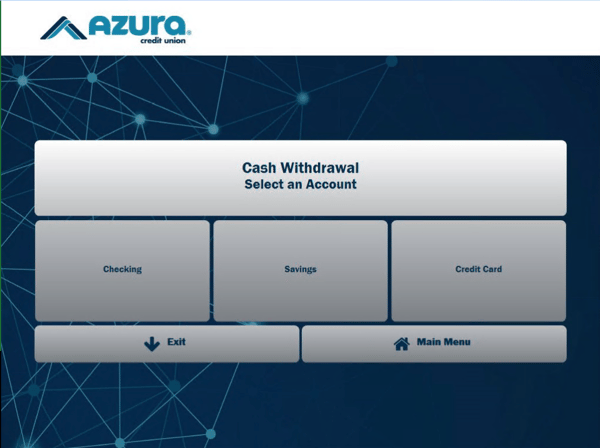
STEP 3: SELECT THE ACCOUNT YOU WANT TO USE FOR YOUR CASH WITHDRAWAL
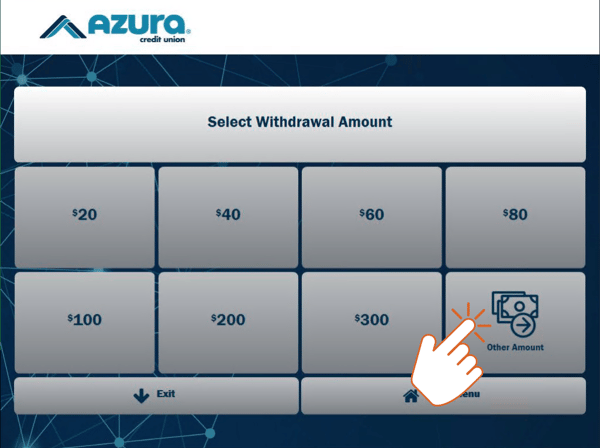
STEP 4: SELECT THE "OTHER AMOUNT" BUTTON
You need to select the button that says "Other Amount" if you want to customize the bills you will receive from your withdrawal. You'll be able to choose the total amount you want to withdrawal in the next step.
*NOTE: If you select a button with a dollar amount the ITM will automatically choose bills for you. The ITM will give you the smallest number of bills possible, so if you selected $200, the ITM would give you two $100 dollar bills.
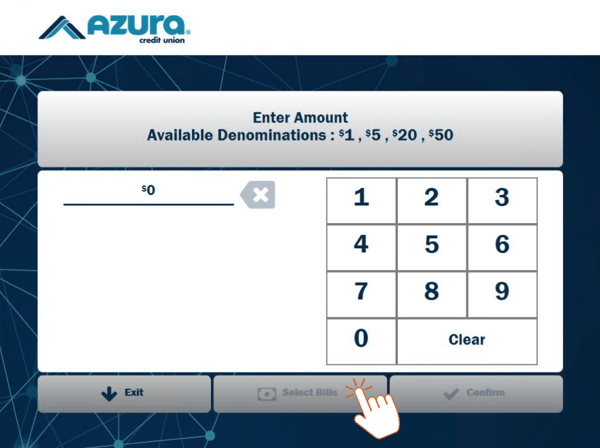
STEP 5: ENTER THE AMOUNT YOU WANT TO WITHDRAW AND SELECT " SELECT BILLS"
On this screen you are able to choose the amount of money you would like to withdraw from your account. The amount you enter can be available in denominations of $1, $5, $20, or $50. Once you've entered the amount you'd like to withdraw, click the "Select Bills" button.
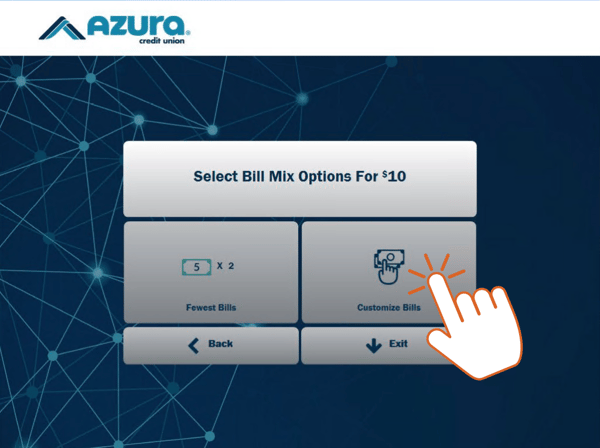
STEP 6: SELECT "CUSTOMIZE BILLS"
To choose the bills you'll get back, be sure you select "Customize Bills".
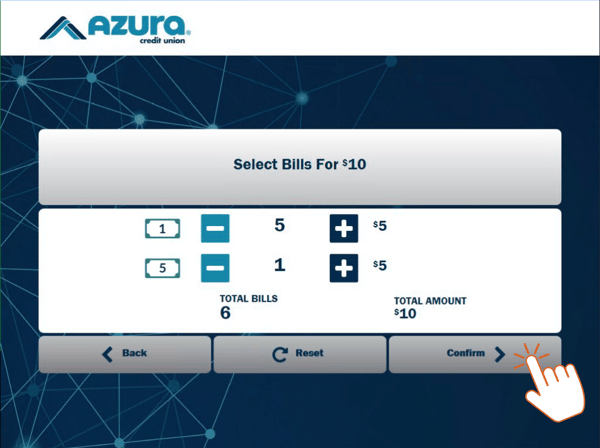
STEP 7: CHOOSE THE BILLS YOU WANT THEN SELECT THE "CONFIRM" BUTTON
You will now have the ability to select your choice of bills! When selecting the desired bill denominations, the "+" for any denomination amounts larger than the remainder of the withdrawal will automatically become unavailable.
The "Confirm" button can be selected once the total withdrawal amount is reached. Pressing "Confirm" will dispense the bills you selected and print your transaction receipt.
Try it out for yourself at one of our upgraded locations.
 You'll become a bill customizing pro in no time!
If you need some practice, our Azura Teller Team is just a tap away from 8:00 am to 6:00 pm Monday through Friday, and 9:00am to Noon on Saturdays with the 'Talk to Teller' Button.
Our team is here to answer your questions or complete the transaction for you. We're ready to go Above & Beyond Banking!
Want to learn more about our ITMs?
Many of our branches now offer ITMs with tellers who are local Azura Credit Union employees. If you're not familiar with our ITMs, check out our website to learn more about our ITMs/Video Teller Machines.